

Add a domain or a subdomain to the EC2 instance using Godaddy domain provider 2023


Table of contents
Adding a custom domain and deploying an SSL certificate can be a crucial step in establishing a professional online presence and ensuring the security of your website and its users. However, it is important to note that this process, while relatively straightforward, is also delicate and prone to errors that can cause your SSL certificate to fail to properly install.
To ensure the success of this process, it is important to follow all steps carefully and thoroughly. First, you will need to register your custom domain name with a domain registrar and point it to the IP address of your server. This will allow your website to be accessed using your custom domain name, instead of a default IP address or subdomain provided by your hosting provider.
Next, you will need to obtain an SSL certificate for your custom domain name. There are various types of SSL certificates available, ranging from basic domain validation certificates to more advanced options such as organization validation and extended validation certificates. Depending on the type of SSL certificate you choose, you may need to provide additional documentation to verify the ownership of your domain and the authenticity of your organization.
Once you have obtained your SSL certificate, you will need to install it on your server. This process can vary depending on the type of server you are using and the type of SSL certificate you have obtained but generally involves generating a certificate signing request, installing the certificate files on your server, and configuring your server to use the certificate for SSL encryption.
It is important to carefully follow the instructions provided by your SSL certificate provider and hosting provider, as small errors in the configuration process can result in the SSL certificate not being properly installed and your website being inaccessible or appearing untrusted to users.
To Start off
Firstly Go to Route 53 on your AWS console that is the part that takes care of all hosting
1)Press on the Create hosted Zone button
2) Put the Domain name as the domain name that you have bought from GoDaddy example hackhack.xyz
3)Go to your Godaddy account >My Domains > Choose your domain>Manage DNS
4)Go down and search for the Nameservers option there select the Enter my own nameservers (advanced)
5)Again on your AWS console in Route 53 go to Hosted Zones>Your domain name
You must land on a page like this below
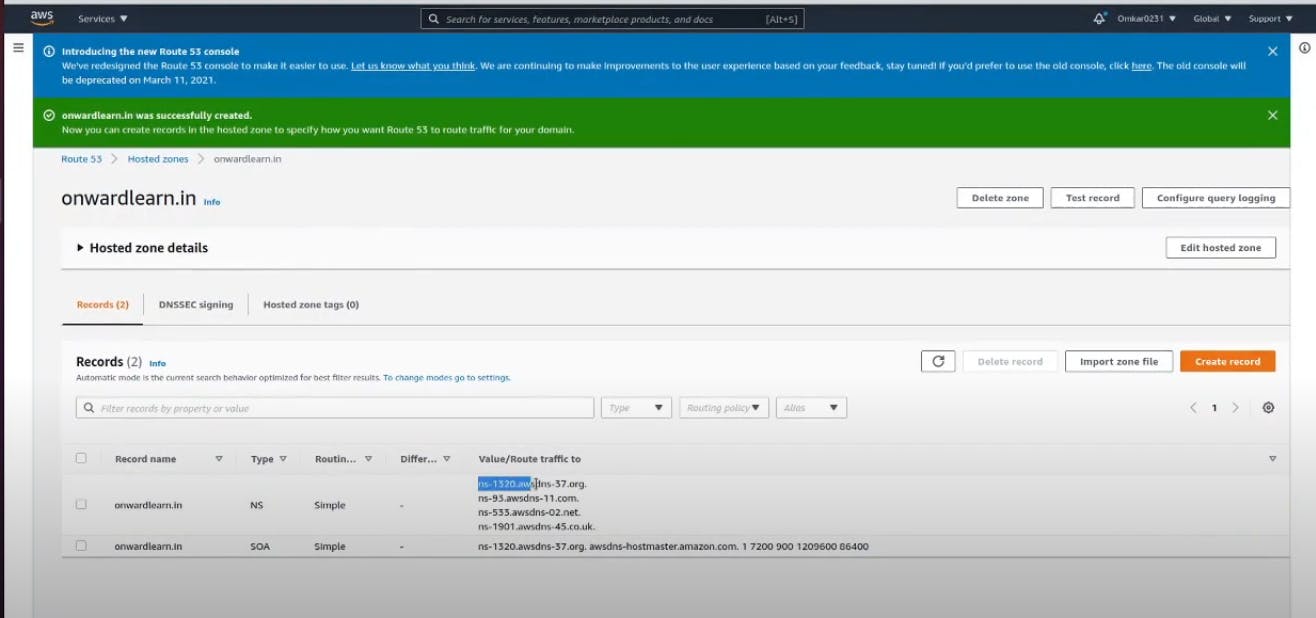
5)Now copy the Value/Route traffic one by one and paste them on the GoDaddy Nameservers fields

6)Now Save it and give your consent
7)Now go back to Route 53 and then press on create record
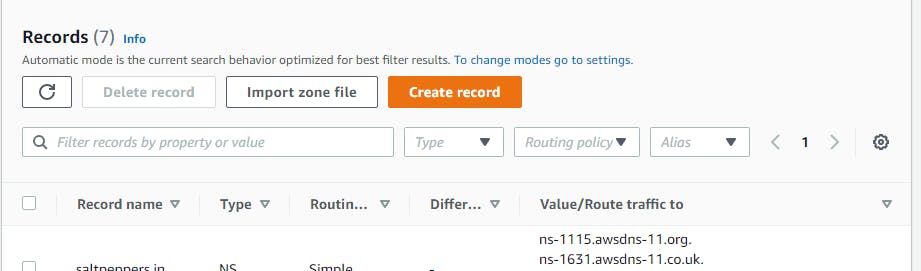
8)Once you press it press define a simple record>Create a simple record
9)Fill in your domain name and rest as shown below now if you want a subdomain ie something like app.hackhack.com then change it in the record name column else leave it empty for now
PLEASE NOTE THE VALUE FIELD CHOOSE THE LOCATION AS THE SAME AS YOUR ELASTIC BEANSTALK ELSE ITLL NOT WORK
TO FIND THE LOCATION OF YOUR ELASTIC BEANSTALK GO TO THE ELASTIC BEANSTALK SECTION AND ON THE TOP RIGHT YOU WILL BE ABLE TO SEE IT
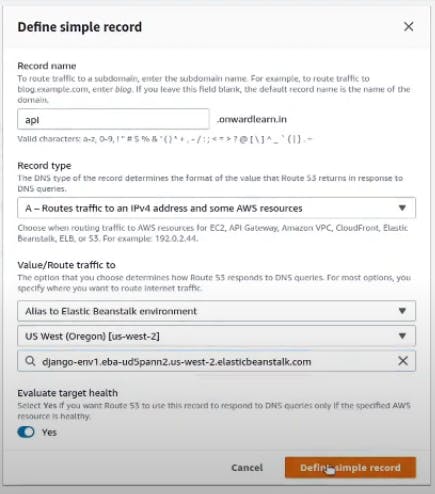
8)Now press define simple record and create a record
9)Now you have to follow step 7 again and this time the only difference will be in the record name field put www
10)Wait for a minute or 2 and go to your domain Your website must be up Congratulations!!!
WE ARE NOT DONE STILL WE NEED TO ADD A SSL CERTIFICATION
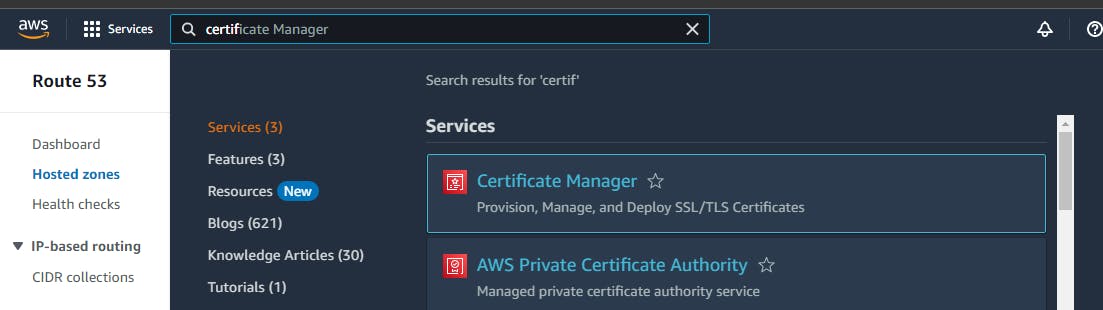
1)Go to the Certificate manager
2) Request Certificate>ADD DOMAIN NAME add your domain name then press add more and add your subdomain name as well
3)Press Save and wait for a minute it'll be verified now go back to your certificate by clicking it again

4) once you press it add your certificate to route 53 by scrolling down and pressing the Create records in Route 53 button
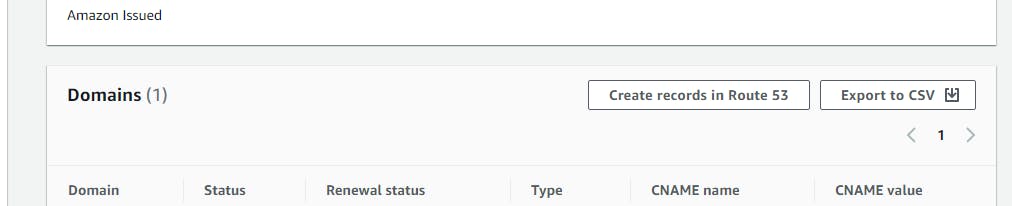
5)Now wait for some time and go back you must see the issued mark
6)IMPORTANT STEP Go to your EC2 Instance and then scroll down and go to the LOAD BALANCERS
7)Press on your load balancer and there must be a default port 80 listener you will have to change the settings as below press on HTTP:80>EDIT and change as shown below
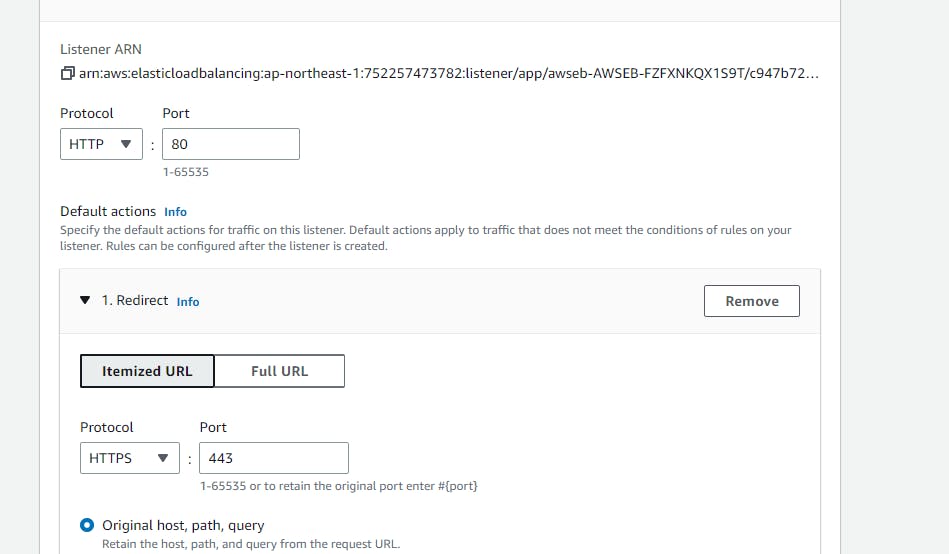
change the status code to 302 found and save it
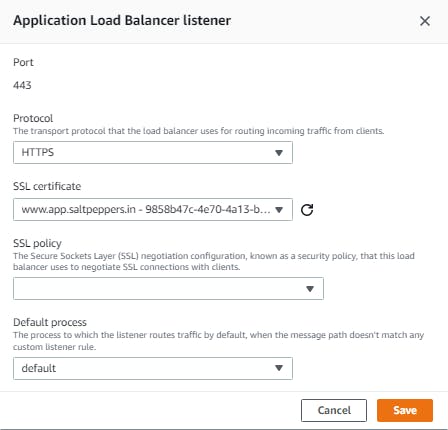
8)Now press on Add Listener
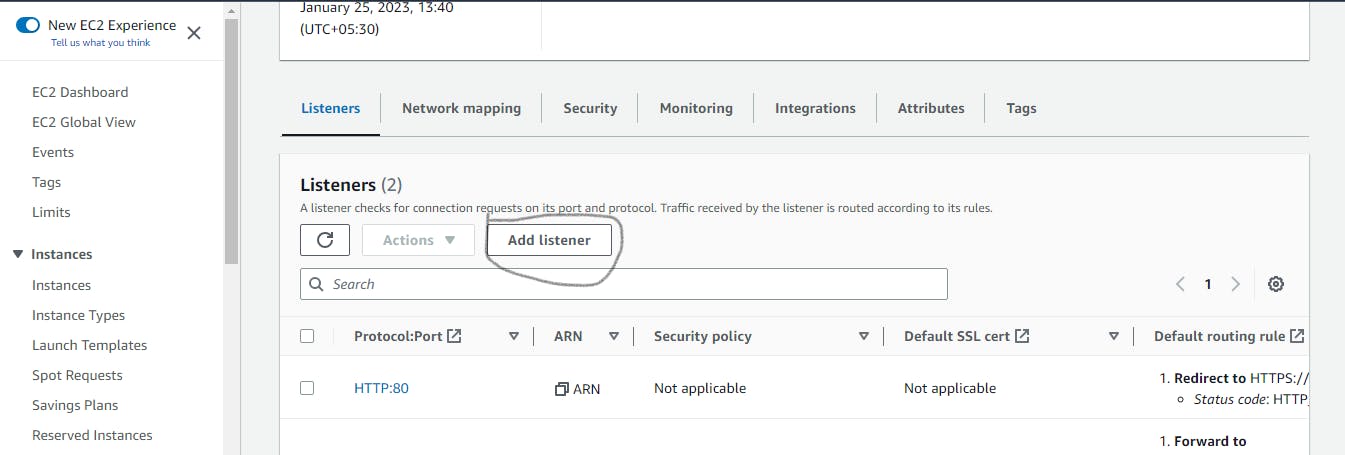
9)Follow the steps below
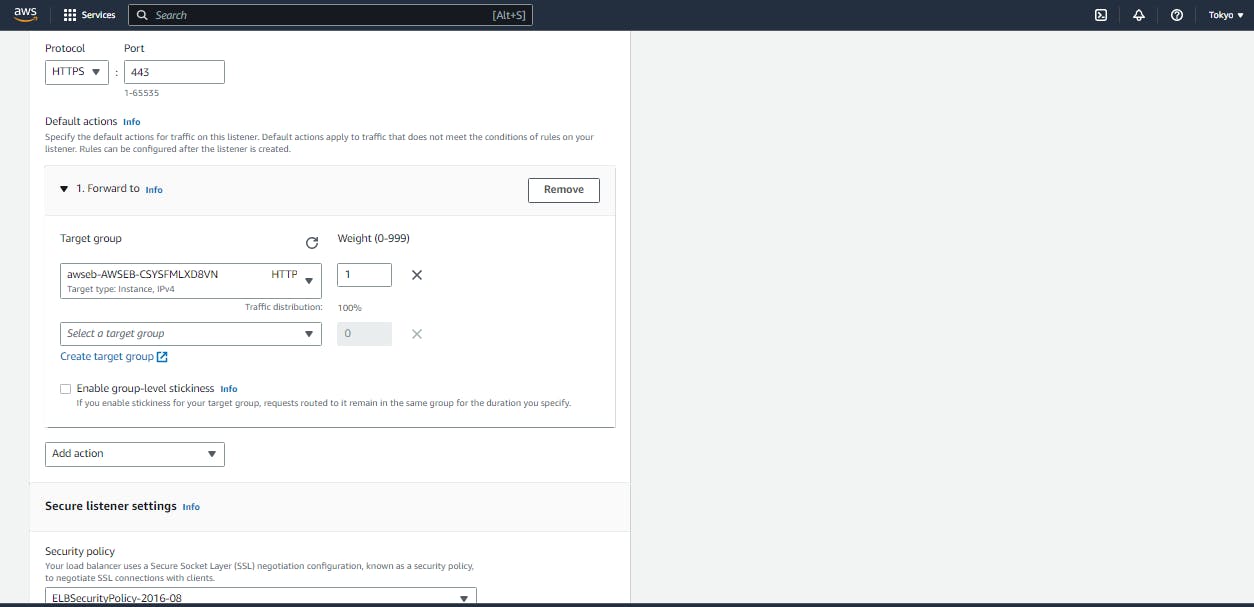
now save changes
Now go back to load balancers again you must see an error telling you the security rules are not configured for HTTPS:443 to fix this go to security groups under security
10)Now search for your group with the Description SecurityGroup for Elastic BeanStalk
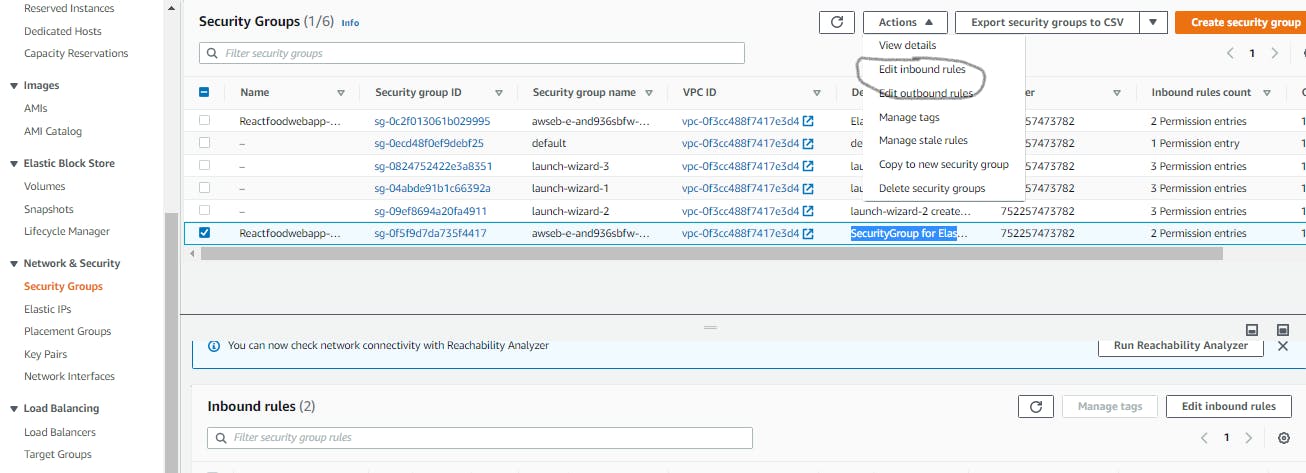
Edit inbound rules then change everything as shown below
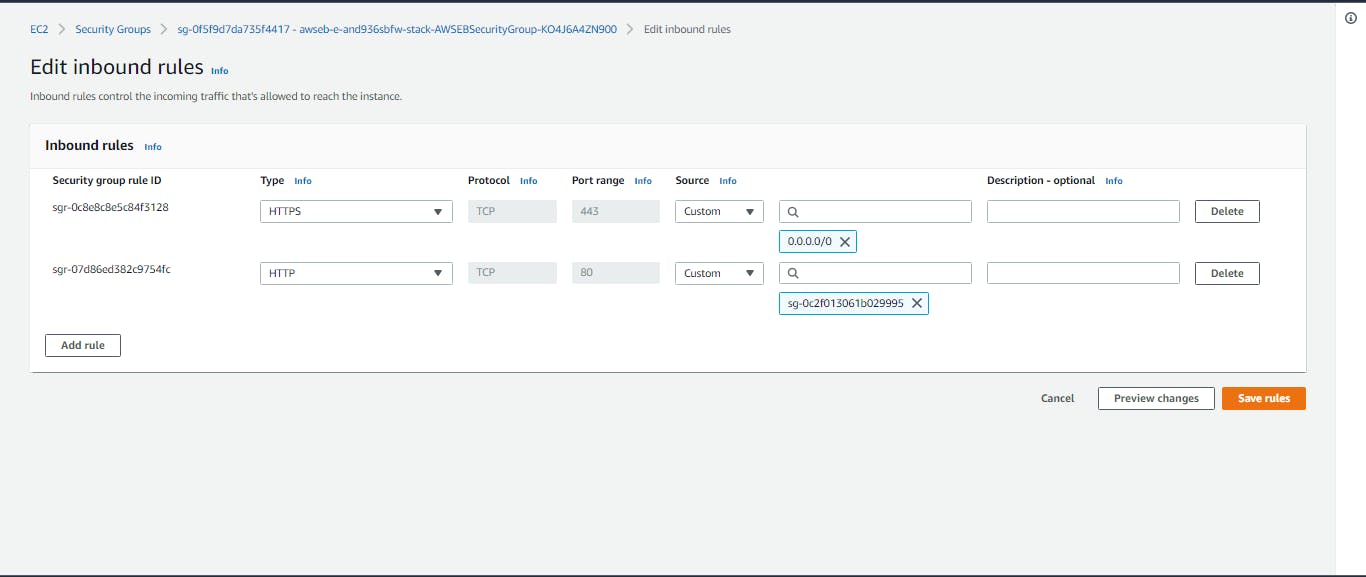
Now the error will disappear from the Load Balancers section
YOU ARE ALL SET HERE!!
FINAL STRETCH
1)Go to your Elastic Beanstalk section by searching it in the search bar then go to Elastic Beanstalk\>Environments
2)Once you press on your env it must look something like this
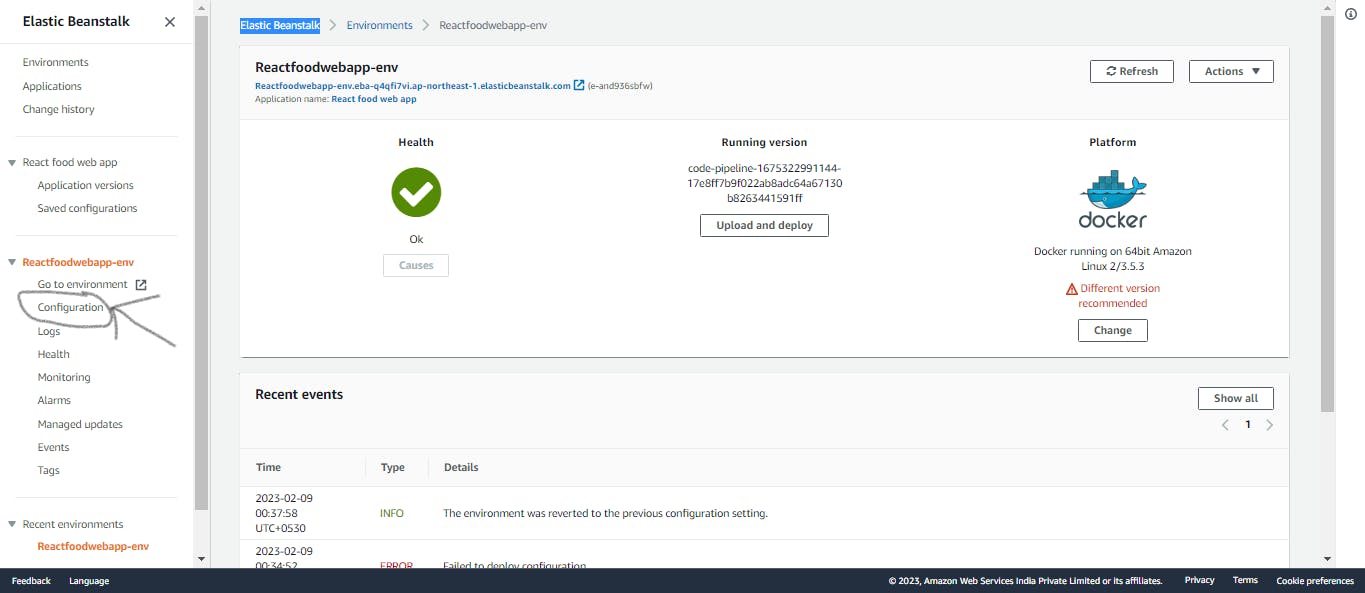
Press on Configuration>Load Balancers
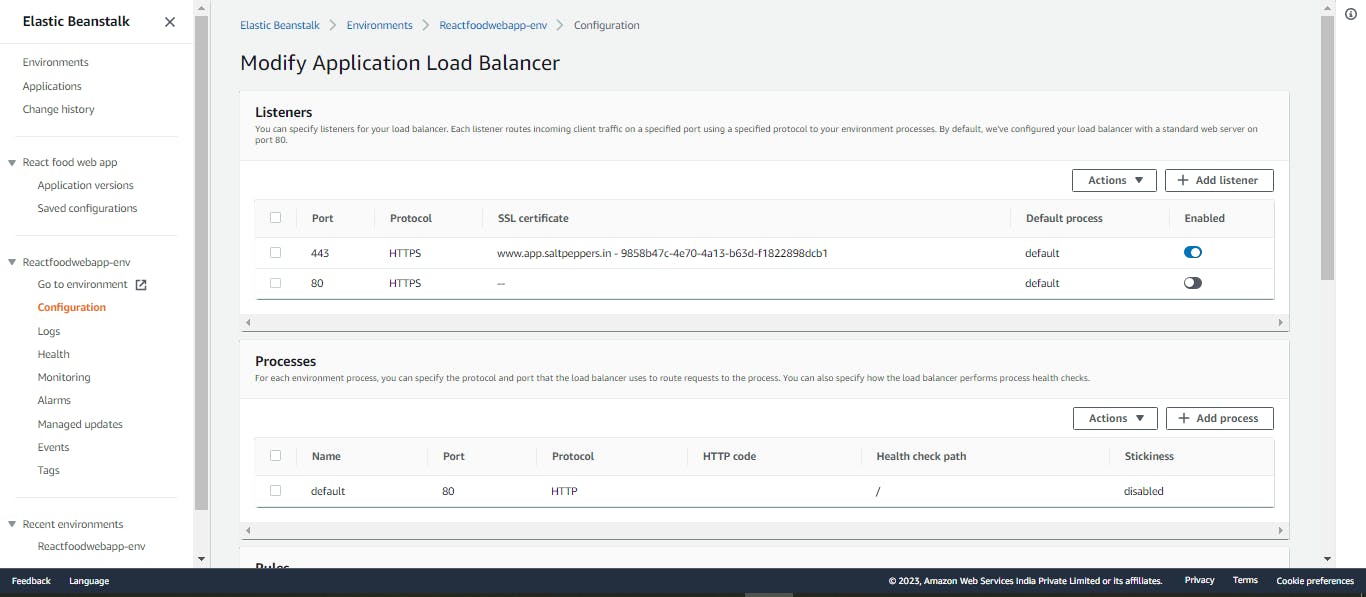
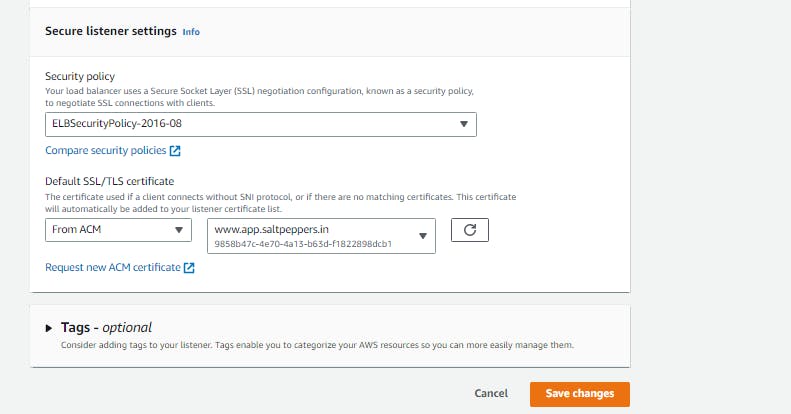
You will have to work with the Listeners leave the default listener 80 as it is and create another listener with port 443 by pressing Add Listener
Add the required and LEAVE THE SSL policy field empty if you don't know what to put there you can refer to these docs for more info https://docs.aws.amazon.com/elasticloadbalancing/latest/application/create-https-listener.html
Now press save
Final step
go down and Apply the configuration

Now go back to the environments section and wait for the changes to take place . Congratulations your site has now been hosted with your custom domain and an SSL certificate
In conclusion, adding a domain or subdomain to an EC2 instance using a domain provider such as GoDaddy is a simple and straightforward process. With the use of GoDaddy's control panel and the Amazon EC2 instance, it is possible to create a fully functioning website, accessible from anywhere in the world. The process involves updating the DNS records in GoDaddy to point to the EC2 instance's IP address and configuring the Apache web server on the EC2 instance to respond to requests for the domain or subdomain. With the ability to add a domain or subdomain to an EC2 instance, businesses and individuals have the power to create a professional and reliable online presence.
##